
Convert Galvanized Troughs into Planters
Here’s a fun and easy way to get your garden started! Galvanized bins are traditionally used as animal feed or water troughs, but they also make great planters and are pretty cool looking too! Best of all, this is a project you can easily complete over a weekend.
There are just 3 steps to using galvanized bins as planters:
- Drill Drainage Holes
- Position Bins and Fill with Soil
- Start Planting!
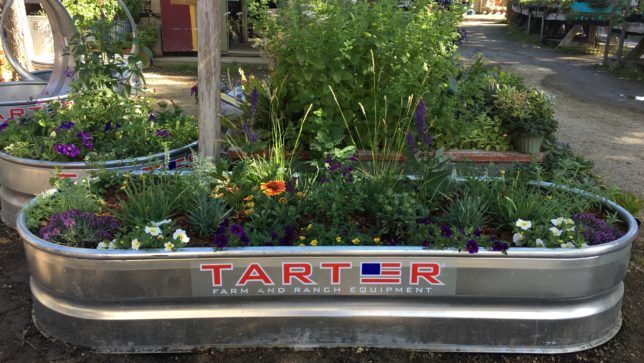
Think about what size would be best for your space and for what you want to grow (Alden Lane carries heavy-duty Tarter galvanized Troughs in a wide variety of sizes).
 DRILL DRAINAGE HOLES
You’ll want to make sure what you are going to plant has plenty of drainage, so drilling holes at the bottom of your galvanized trough is important. This takes a little work, but it’s worth it! Here’s how:
- Flip the Trough upside down for drilling (you may want to put a tarp or a blanket underneath to catch the metal scraps).
- Using a 1/2-inch metal drill bit, drill holes around the perimeter of the trough, as well as across the middle. This could drain the battery in a cordless drill quickly, so a corded drill might be a better option if you have one.
POSITION BINS & FILL WITH SOIL
Consider the plants you plan to use when you choose a space, as you may need full sun or partial shade. Measure and mark the spot you’ll be placing the Troughs. Take the time to make sure they are level, which is important for drainage. Remember, once the Troughs are full of soil, they will be fairly permanent, because of their weight (though you can always empty the soil out to move them).
If positioning the planter on open ground, place four to six bricks (or more, depending on the size of the planter) in a square or rectangular pattern in the spot where your planter will sit. Space the bricks so they form a shape slightly smaller than the bottom of the galvanized tub. Depending on the size of the Trough, you may need to put some in the middle to prevent sagging.
- Place the tub on top of the bricks, checking to make sure it sits level. If the ground is not level, add or remove soil from underneath bricks until the tub sits flat
- If positioning the planter on a patio or other hard surface, use shims to level the planter. This will allow moisture to drain from the tub more easily.
- For soil, we recommend Master Nursery Professional Potting Soil, or E.B. Stone Cactus and Succulent mix.
- Fill your galvanized Troughs to the very top with soil. Keep in mind that the soil will settle, and stopping even just a few inches from the top of the bins will create a gap that will cast a shadow on your plants.
START PLANTING
Now you’re ready to plant, which is the fun part! Snap peas and lettuce are examples of cool-season vegetables that can be sown directly in the bins. Cherry tomatoes and summer squash are examples of warm-season vegetables that can either be started indoors or purchased as seedlings. You can mix and match – starting with some direct sowing early in the season and adding other seedlings and warm-season veggies as the season progresses.
Happy planting in your galvanized bins!
Follow us on social media!